Contents
One of the most important areas in network infrastructure is patch panel cable management, where it is crucial to have a well-organized setup area. Regardless if you are a beginner, a business owner, a network technician, or just a network enthusiast, you need to recognize the impact of good management of patch panel cables. Understanding patch panel wire management techniques is the starting point for good network cable management.
Below you’ll find a detailed guide on the best practices, tools, and expert tips for setting up your patch panel cables and avoiding common issues.
Let’s start exploring what patch panels are, their usage, as well as what cable management is and its importance.
Understanding Cable Management
Cable management refers to the practice of arranging, securing, and routing cables in any environment. It can be at an office, a big data center, or a simple home setup. Its main goals are to improve the performance of the system, enhance safety (as it reduces trip hazards and electrical risks), and simplify maintenance or upgrades through neat and well-organized cabling. A tidy cable setup not only enhances functionality but also contributes to a professional environment.
Why Is Cable Management Important?
Correct cable management is essential for various reasons. The most important are:
- Efficiency
- Saves time and reduces potential issues in the future.
- Helps to identify and resolve issues easily.
- Reduces heat buildup, which can save energy.
- Safety
- Complies with the National Electrical Code requirement of leaving 3 feet of free space around active electrical devices.
- Reduces the chances of technicians getting hurt.
- Prevents tripping risks and eventual damage to cables and equipment.
- Diagnosis
- It is easier to locate and fix issues.
- Lowers the time and costs derived from service calls and troubleshooting.
- Airflow
- There will be better airflow around equipment, which will allow stable operational efficiency.
- Keeps temperatures consistently low, which benefits cabling, network hardware performance, and equipment longevity.
- As it prevents overheating, it avoids cable expansion, loss of efficiency, and network slowdowns.
- Future-Proofing
- Makes upgrades and future repairs much easier.
- Facing low-voltage industry changes, helps to make smooth transitions to new technologies and practices.
Through proper cable management, you can enhance operational efficiency, safety, and the durability of network systems while reducing energy-related costs.
Understanding Patch Panel Cable Management
Patch panel cable management is a more specified subset of cable management. Concretely, it is about organizing the cables connected to patch panels in a network or telecommunications system. It involves arranging and labeling cables that end up at patch panels for more efficient connectivity. Similarly, as in general cable management, this practice simplifies troubleshooting and facilitates easy reconfiguration or expansion of the network infrastructure.
To summarize, patch panel cable management improves the functionality and makes the troubleshooting and maintenance of complex network systems much simple.
What Are Patch Panels?
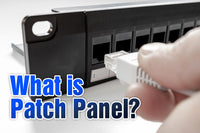
Patch panels are pieces of hardware that have blank ports on one side and termination points on the other. It is typically a piece of hardware device that connects and organizes several network cables in one central place. It has a row of ports, and each port connects to a cable linking to a different device or outlet. There are also other types of patch panels with different designs, including punch down and feed-through patch panels. They are usually used within a Local Area Network (LAN) to terminate and organize cables.
A patch panel enables managing the different network connections without modifying the cabling infrastructure. The main advantages of using patch panels are:
- Make network management simple
- Help to keep the set-up organized
- Help to keep cables neat and avoid cable clutter
- Troubleshooting becomes easier for beginners and professionals.
There are different types of patch panels, depending on the number of ports they have, the cables they support, and their form factors.
- Sizes: They typically come in configurations like 12-port, 24-port, and 48-port panels. The height of patch panels is usually measured in rack units (U). When selecting a patch panel, the height should be chosen based on your own needs for network installation.
- Types of cables they support: Twisted-pair copper cables and Fiber optic cables
-
Form factors:
Fixed Patch Panels: These are permanent connectors that cannot be altered.
Modular Patch Panels: These allow exchanging the types of connectors when needing more elasticity across the different types of cabling
Notes: Patch Panels vs. Switches: They serve different functions. Patch panels are just static switchboards that interconnect network devices within a LAN. It is not a communication device of the network system, but a hub for interconnecting different network devices. While switches are used for enabling internet access and data sharing. In data centers, top-of-rack switches (ToR) can be used as patch panels by connecting devices within the same rack. They help organize network cables and make connections better. However, top-of-rack switches are more expensive than patch panels.
Best Practices for Patch Panel Cable Management
To keep patch panel cables neat and functional, it’s mandatory to implement the right techniques and strategies.
The best patch panel wire management techniques include:
Labeling the Cables
Labeling helps quickly identify each connection, which saves time when troubleshooting or expanding the network. Label both ends of the cables using labels that resist wear and tear.
Bundling the Cables
Use Velcro straps or metal ties to secure cables, ensuring they are not overtightened while allowing for easy adjustment. Bundling cables by function or type can also help reduce interference.
Maintaining Service Loops
Leave a service loop, or a small amount of extra cable, for each connection. This ensures flexibility during maintenance and minimizes tension on cables. Otherwise, you could damage the connectors or create weak points.
Cable Routing Planning
Set clear paths for cables within the rack or wall-mounted system. Avoid overlapping routes to evade interweaving or future obstructions. When placing the cables, minimize bending and avoid sharp angles - as this could reduce the quality of the signal in the future.
Select the Cable Length to Match the Rack’s Layout
If you use disproportionately long cables this will create clutter and most likely obstruct airflow. Instead, measure the distances and choose cables that closely match the layout. In addition, the maximum running length of Ethernet cable is 100 meters (328 feet).
Use Cable Manager With Patch Panel
Using cable managers alongside with patch panels is essential for achieving a clean, organized, and efficient network setup. They can keep cables neatly arranged, improve airflow, and reduce strain.
Regularly Check and Clean Cables
Dust and debris accumulate in network equipment. This can cause overheating or signal issues, so don’t neglect cleaning them. Also check if there are any signs of wear and tear on the cables, particularly around connectors. Replace the damaged cables without delay.
Expert Tip: Opt for Shielded Cables in High-EMI Environments
In places where there are lots of electronic equipment, it’s advisable to use shielded cables as they can protect data integrity by diminishing the electromagnetic interference (EMI). This is particularly important in offices or data centers that use high-speed applications.
Tools and Accessories for Optimum Patch Panel Cable Management
For proper patch panel cable management, you’ll need specific tools and accessories to help you organize your setup with simplicity and to cut the risk of interference. Some of the items should be included for copper cable patch panel setups:
- Keystone Jacks or Keystone Couplers: They are utmost useful to organize connections. Besides, they fit tidily into patch panels. When selecting jacks, ensure they match the speed requirements of your network, like Cat6 or Cat6a for higher data rates.
- Shielded Cables for EMI Reduction: These cables reduce any interference from any adjacent electronic devices. They are ideal for high-speed setups and environments with ample electronic activity. If you want to reduce the overall EMI protection, also use shielded patch panels.
- Cable Management Bars and Cable Ties: Use horizontal cable managers to keep cables aligned in racks. Also consider using Velcro ties as a flexible, reusable option for securing cables without harming
- Punch-Down Tool: If you are using punch-down patch panels, a punch-down tool can speed up installation as it will ensure each cable is securely connected, lessening signal loss and future rework.
- Use the Right Patch Cables for Your Network. Contemplate the cable type (Cat6 vs. Cat6a), shielding vs unshielded, and length.
Expert Tip: Regularly Check the Cables Tension. When the cables are under tension, they are prone to wear. Don’t neglect to make regular inspections and adjustments (if needed). With a small service loop, you will ensure your cables durability, especially when reconfiguring.
Expert Tips for Better Patch Panel Cable Management
- For small offices: Label each cable and panel port using the user’s name or desk number for faster identification in case you need to do some troubleshooting or reconfiguration.
- For data centers: Maintain detailed records of cable layouts and updates to quickly identify any issues and plan future expansions better. Also, adhere to industry standards for cable organization to ensures better scalability and maintenance, making your system more efficient and manageable in the long term.
- For home entertainment setups: Hide cables using cable conduits, behind-wall solutions, or raceways to keep a clean aesthetic and avoid accidentally disconnecting them. It’s also advisable to mark which cable corresponds to which device (e.g., game console, TV, speaker) in case you need to add or remove any equipment
Conclusion
Effective patch panel cable management is the spinal cord of a reliable, scalable, and easy-to-maintain network setup. Apply the proven best practice, use the proper tools and you’ll stay away from making the common mistakes. Moreover, you’ll achieve a well-organized infrastructure that supports present and future needs.
Taking into consideration the tips and guides provided below, will not only prevent hours of headache when troubleshooting needs to be done but will also add to more professionalism and efficiency in a small office and big data centers.
This guide has given you an overview and equipped you to either get started or enhance your patch panel cable management.
For more information on this topic, you can keep up on our blogs. While VCELINK offers general and basic information for our customers and other visitors to the website, it’s not professional advice.


Be the first one to comment.
Leave a comment